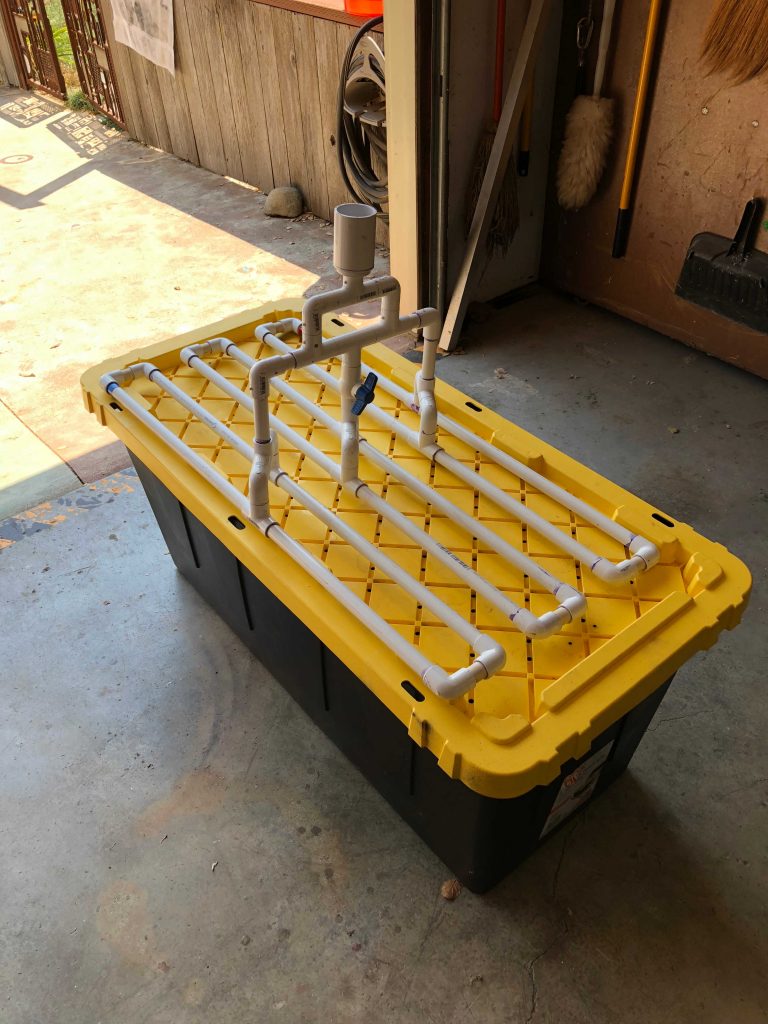
The evaporator arrangement you have can be of any style and configuration. But Playa Paul has created one for you that is east to transport and setup by your staff. The system is designed so that one person can set it up in about an hour. This GREATLY frees up valuable paid staff time for setting up the rest of your camp.

Almost all of the parts fit within a bin which doubles as the sump/containment basin for the evaporator on playa. When the event is over, your staff simply dissemble the evaporator and put the contents back in the bin. Later, your staff can simply clean the parts with a pressure washer (but not the evap pads themselves as they are delicate when wet). Very quickly your evaporator is ready for use next year.
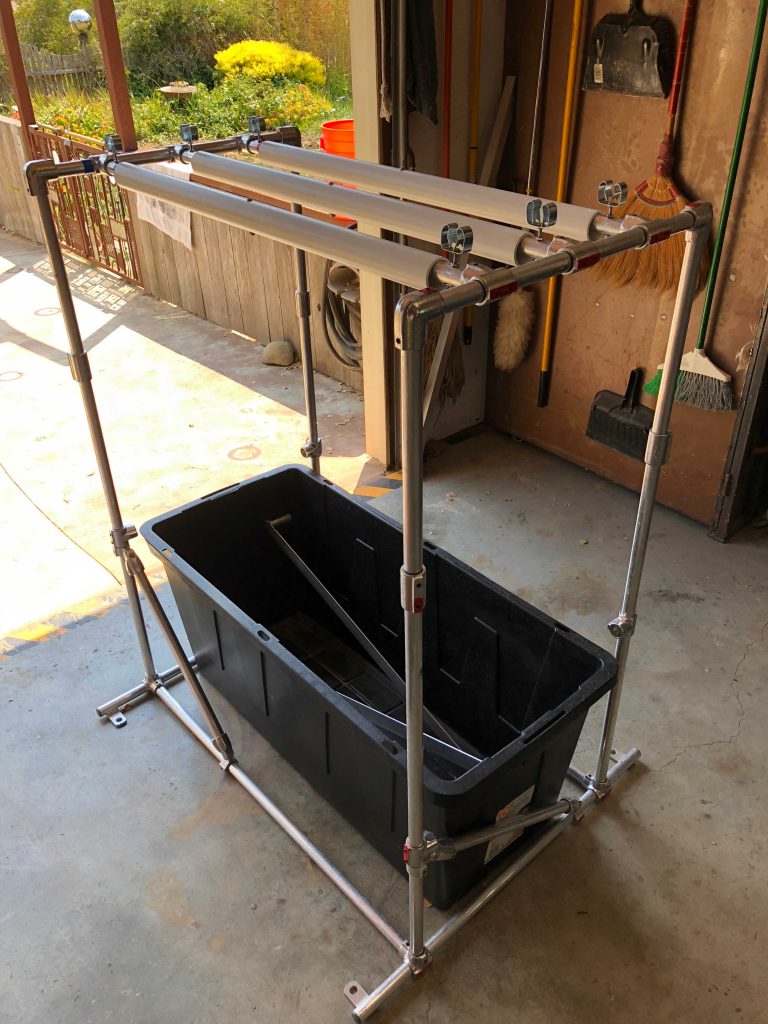
In this version, there 3 rows of evaporator pads. However, only 2 actually fit in the bin. The last pad will be transported along with the rest of our gear and staff.

The framework of your evaporator can be made of wood, PVC or, as in our case, speed rail. Whatever you choose, you should be able to construct a system that disassembles and stores within the bin after the event.

With the frame assembled and the rows installed, the bin is placed within the frame and will now serve as a catch basin for the water as the evaporator is cycling. The base of the frame has tabs with holes on them to facilitate fastening to the ground with lag bolts screwed into the playa. Note the “U” clips on each row. This will hold the distribution array

Pads are placed on the rows and centered. Note how they hang down INTO the sump, thereby ensuring no water drips on the playa. All goes back into the sump. A set of bars have been places just above the edge of the sump to endure the pads stay in place even very windy days. This is important because the amount of water you can evaporate goes up dramatically with wind present. You don’t want the pads blowing out of the sump. The bars have a slight twist in them so that any water that might try to drip down the sides of the pads is caught and directed back into the sump.
The distribution array is simply clipped in place and it’s ready to evaporate. Each row is set up to drip water in the middle of the pad. Note also the plastic coating where the evap pad is draped over the bars – this gives strength and stability to the pad when it is wet and heavy with water.

Even the edges of the pads are sprayed with a plastic coating to give them strength.

Now that it’s all together, lets dump a load of water to see how it flows. The distribution array has a “leveling valve” to adjust the flow of water through the center array. More water wants to flow through that then the outside arrays so this valve allows the operator to ensure even flow over all 3 rows.
